
How to Autofocus Using React Hooks
Autofocus can make your app more convenient for users. Instead of clicking into a field before they type, they can just start typing when a form loads. And if they are dealing with a large form, they can tab through the rest of the fields after that down to the submit button and hit enter without ever touching their mouse.
In this article, we’ll look at how to add autofocus to React input fields. Then we will make our code reusable by turning what we wrote into a hook.
Autofocusing fields without using hooks
There are actually quite a few ways to autofocus a React input field.
The autoFocus prop
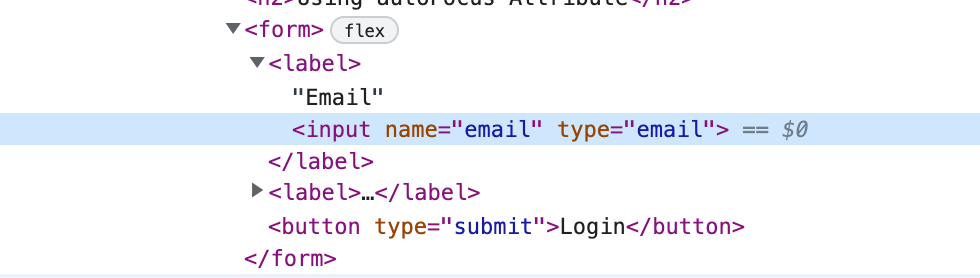
You can use the autoFocus prop.
const Form = () => {
  return (
    <form>
      <label>
        Email
        <input name="email" type="email" autoFocus />
      </label>
      <label>
        Password
        <input name="email" type="email" />
      </label>
      <button type="submit">Login</button>
    </form>
  );
};
export default Form;
This will work but there is a caveat we will get to. Also remember to use “autoFocus” not “autofocus”. When you do this, React never actually sets the autofocus DOM attribute.
Each browser has different rules when it comes to how this attribute works. Because of these inconsistencies, React calls focus() on the element when it mounts.
But it doesn’t always work. If you add React to an existing application and render a component into a detached element, React will call focus() before the browser is ready and the input will not be focused when it gets added to the DOM. So instead of depending on React to call focus() on the input, we are going to do it ourselves.
Autofocusing with useCallback()
The first way we can get more control over autofocus is with the useCallback() hook. Here is the same form with our new code:
import React, { useCallback } from "react";

const Form = () => {
  const emailInput = useCallback((inputElement) => {
    if (inputElement) {
      inputElement.focus();
    }
  }, []);

  return (
    <form>
      <label>
        Email
        <input name="email" type="email" ref={emailInput} />
      </label>
      <label>
        Password
        <input name="email" type="email" />
      </label>
      <button type="submit">Login</button>
    </form>
  );
};
export default Form;
The useCallback() hook returns a memoized callback. It accepts two parameters. The first is the function that you want to run and the second is an array of values that running the function is dependent on. We have an empty array for that parameter which will mean this function will run only once when the component renders.
When the form component renders, the reference for the email input will be set, which executes the function we have in the useCallback() hook, and that function calls focus() on the input.
Autofocusing using with useRef() and useEffect()
We can also get the same functionality with the useRef() and useEffect() React hooks. Here is the same form using these hooks:
import React, { useRef, useEffect } from "react";

const Form = () => {
  const emailInput = useRef(null);

  useEffect(() => {
    if (emailInput.current) {
      emailInput.current.focus();
    }
  }, []);

  return (
    <form>
      <label>
        Email
        <input name="email" type="email" ref={emailInput} />
      </label>
      <label>
        Password
        <input name="email" type="email" />
      </label>
      <button type="submit">Login</button>
    </form>
  );
};
export default Form;
The useEffect() hook will tell React that you need your component to do something after it renders. It accepts two parameters. The first is the function that you want to run and the second is a dependency array that functions the same as it did in useCallback().
The useRef() hook does for functional components what the createRef() did for class based components. This hook creates a plain JavaScript object that you can pass to an element to keep a reference of it. This reference can be accessed through the current property of the object.
So, in the code above, we create a reference to the email field. Then, when the component renders, we call focus() on the email field using the current property on reference object.
It’s pretty simple code, but if you have a lot of forms that use autofocus, it’s much cleaner to turn this code into a hook so you can reuse it.
What are hooks?
I have to admit I didn’t do much with React hooks when they first came out. I used them when they were there and seemed like a good solution, but I never wrote any of my own hooks at first. Another new thing you have to learn. Who needs that when we already have stuff that works?
That was until I had three React components that had different JSX, but all the rest of their code was basically the same, so it was copied and pasted. And it was bothering me. Here I would usually create a custom class for this functionality if I was using class components, but that didn’t feel right when all of my components were functional.
So I looked into creating a hook. And what I learned was a hook is a simply a function you create that accepts values and returns other values. Or, in other words, just a plain function with a special name so you can organize your code, put all of your “hooks” together in the same folder, and have less duplicated code. The name scared me away for a while because I thought it indicated some special type of functionality, like a thunk or a saga.
You can also use the official definition from React:
Hooks are functions that let you “hook into” React state and lifecycle features from function components.
But I think that limits you when thinking of things you could use them for. So let’s turn this autofocus functionality into a hook.
Turning our autofocus functionality into a hook
Since we have come up with two ways to autofocus an input in React, we can create two versions of our useAutoFocus() hook. The first version with use useCallback().
import { useCallback } from "react";

const useAutoFocus = () => {
  const inputRef = useCallback((inputElement) => {
    if (inputElement) {
      inputElement.focus();
    }
  }, []);

  return inputRef;
};

export default useAutoFocus;
The second version uses useRef() and useEffect().
import { useRef, useEffect } from "react";

const useAutoFocus = () => {
  const inputRef = useRef(null);

  useEffect(() => {
    if (inputRef.current) {
      inputRef.current.focus();
    }
  }, []);

  return inputRef;
};

export default useAutoFocus;
All we did with either versions of this hook is removed the autofocus functionality from the form itself and move it into its own file. The code is essentially the same. In the first we return the callback function we created and in the second we return the the ref. And we can use either one with the form component.
import React from "react";
import useAutoFocus from "../hooks/useAutoFocus";

const Form = () => {
  const emailInput = useAutoFocus();

  return (
    <form>
      <label>
        Email
        <input name="email" type="email" ref={emailInput} />
      </label>
      <label>
        Password
        <input name="email" type="email" />
      </label>
      <button type="submit">Login</button>
    </form>
  );
};
export default Form;
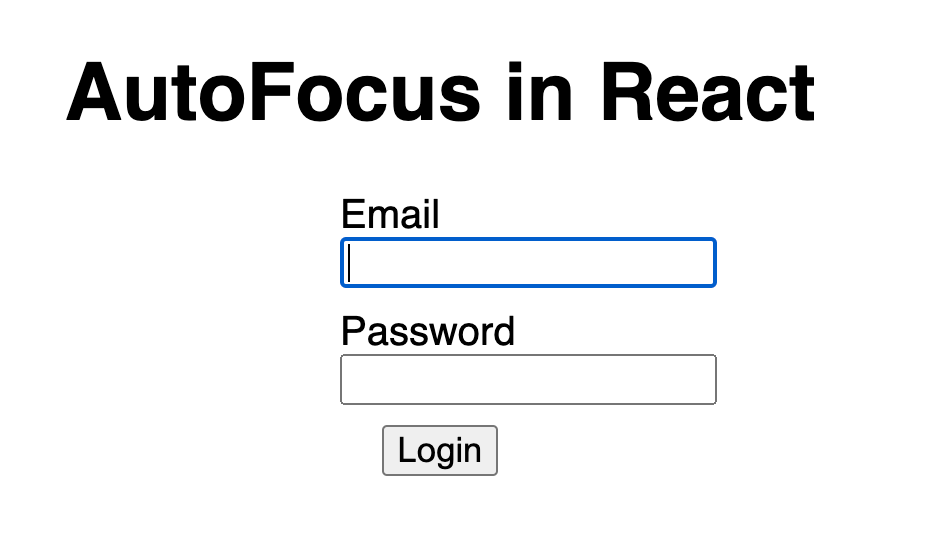
Here we import the useAutoFocus() hook that contains all the autofocus functionality and execute it to get the reference it created. Then, we use the reference on the email field and we gets this result:
Conclusion
We found three ways to autofocus a field in React and we turned two of those methods into hooks. Now instead of copying and pasting code everywhere we have a hook we can reuse. You can find all of the code used for this article in at this CodeSandbox. Hopefully you see how simple and useful custom React hooks can be and start creating your own.
Originally published on LogRocket: How to Autofocus Using React Hooks
Related Posts

How I Built Two Obsidian Plugins While Kiro AI Did Most of the Work
Kiro helped me build two Obsidian plugins in 6-8 hours.

Jules AI - The (Currently) Free Coding Assistant That Can't Follow Directions But Gets Shit Done
Jules is currently free, so I figured it was worth a try. Of course, I had to find out what I could break.

Creating an Obsidian Plugin with Claude AI
I wrote the original script in Python. I had Claude perfect it, then convert it to an Obsidian plugin.

Building an Electron App from Scratch with Claude Code
In my last two posts on "vibe coding" I used Claude Desktop with MCP servers. Then I found out about Claude Code and now have a much better process.